User Groups
About User Groups
User Groups are a collection of your end-users and Organizations. You can have one user or Organization belong to various Groups.
Use Groups to:
- segment customers by value;
- segment customers by support type needed;
- restrict access to areas of your user portal;
- use them in ticket rules & notifications.
Groups cannot contain support agents, because support agents can only be grouped in Teams.
What you can do with Groups
Separate requests by user
You are an online store that needs to separate your retail customer requests from internal help desk requests.
Segment customers by value
You are a store that needs to separate your most valuable customers from customers that spend less.
Support users in different time zones or languages
Create a Group for every time zone and language, assigning your user base to whatever Group you see fit.
Limit user portal content to different users
Make your user portal viewable to all registered users, but have a hidden area limited to users from VIP Customers Group.
Managing Groups
Only Owners and Admins can manage (create, modify, delete) Groups.
Agents can only add/remove Users and Organizations to Groups.
Creating Groups
- Go to People and select User Groups.
- Create a new Group by clicking on the + button and adding a title and optional description.
Adding & removing users
As soon as you create a Group, you can add existing users to it. Manage users via:
User Group page

- Click on a desired Group.
- Click Add User. Start typing in their name or pick from the list. The magnifying glass searches for users already in the Group.
- Remove the user by clicking X to the right of their name.
People page
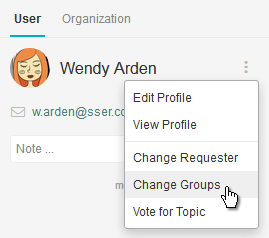
Click ⋮ to the right of their name and pick Change Groups.
User profile
Click ... to the right of User Participation and pick Change Groups.

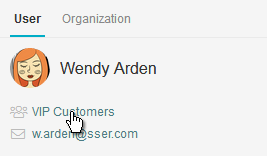
When Groups are added, they're displayed in the sidebar. Click to change them.

Ticket view
Click ⋮ to the right of their name and pick Change Groups.

If a user assigned to Groups becomes an agent, they will be unassigned from their Groups.
Editing & deleting Groups
- Go to People and select User Groups.
- You'll see a list of your Groups. Click the ⋮ button to the right of the desired Group and select Edit or Delete.
Deleting Groups carries some implications. If you set up any Rules & Notifications, they will no longer function as intended.
Using Groups with Tickets
Searching tickets by Groups
To search for tickets belonging to a certain Group:
group:"VIP Customers"
To search for Pending tickets not assigned to a certain Group:
status:pending -group:"Billing Team"
Note: searching for a Group in the People page displays users belonging to the Group.
Using Groups in Rules & Notifications
Specifying Groups in Conditions & Actions
You can filter out incoming requests from a Group.
Example: You want tickets from "VIP Customers" to be assigned to the Owner. Simply set the Condition
Requester: User Group > Is > VIP Customers
and Action
Ticket: Assignee > Mr. Owner
You can make a ticket's Group a criteria for additional action.
Example: You want tickets from "VIP Customers" and "Bonus Program" Group to be assigned to a Team. Simply set the Condition
Ticket: Is > Added
Requester: User Group > Is > VIP Customers, Bonus Program
and Action
Ticket: Assignee > Tier 3 Team
You can add, remove or set one or more Groups to to a user.
Example: You want users with tickets tagged "vip" to only belong to the "VIP Customers" and "Bonus Program" Groups. Simply set the Condition
Ticket: Tags > Contains at least one of the following > vip
and Action
Requester: User Group > Set > VIP Customers, Bonus Program
You can check if a ticket is not part of a Group.
Example: You want tickets that do not belong to any Group to be automatically assigned to Tier 1 Team. Simply set the Condition
Requester: User Group > Is > Unassigned
and Action
Ticket: Assignee > Tier 1 Team
Using Groups with Organizations
A Group can have multiple Organizations in it. If a user belongs to Organization that is assigned to a Group, the user will be treated as a member of that Group by inheritance.

What you can do with Groups and Organizations
User Groups can act as support hubs for Organizations
Example: Create a User Group consisting of tickets from users belonging to different Organizations.
Define access to your user portal by combining User Groups with Organizations
Example: Create a portal where customers from ACME and MCC Organizations can participate with VIP Customers Group.
Adding Organizations to Group
Any staff member can add or remove Organizations to a Group.
As soon as you create a Group, you can add existing users to it. Manage users via:
User Groups page

- Select Organizations tab.
- Start typing Organization name or pick from the list. Remove the Organization by clicking X beside it.
An Organization belonging to a Group will assign users within that Organization to Group by inheritance.
Organization page, User profile, Ticket view
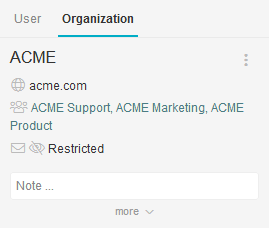
An Organization has a list of Groups it's assigned to. Click on them to change these associations.

Using Groups with Organizations and Teams
Viewing:
- Save views as filters for tickets from User Groups
-
Restrict customer support agents to tickets from a Group or a combination of Groups
- Create off-limits content (Spaces) in your portal for certain Teams and Groups
Rules & Notifications:
- Automatically assign ticket received from users in a Group to a specific Team or agent
- Automatically add new users to an Organization based on their email domain
Groups in User Portal
Content Restrictions
You can use space restrictions to limit user access to portal content.
For example, you can restrict access to your portal in a number of ways:
FAQ page for paying customers
A questions and answers page for features for paid customers.
Knowledge base for VIP Clients
A knowledge base with premium content for VIP clients.
Issue tracking for technical users
A problem tracking page for customers familiar with your product.
Idea lab for beta testers
An idea and suggestion gathering page for users testing the product.
Learn more about Space restrictions
